Western blot (WB) is a routine yet powerful protein detection method used to study post-translational modifications, relative protein abundance, molecular weight, and protein-protein interactions. Since its inception, WB has provided valuable insights for academic research, diagnostics, and therapeutic testing.
As shown in Figure 1, WB separates native or denatured proteins via gel electrophoresis, transfers them to a membrane while preserving peptide integrity and biological activity, and uses specific antibodies to identify and quantify target proteins within complex mixtures extracted from cells or tissues.
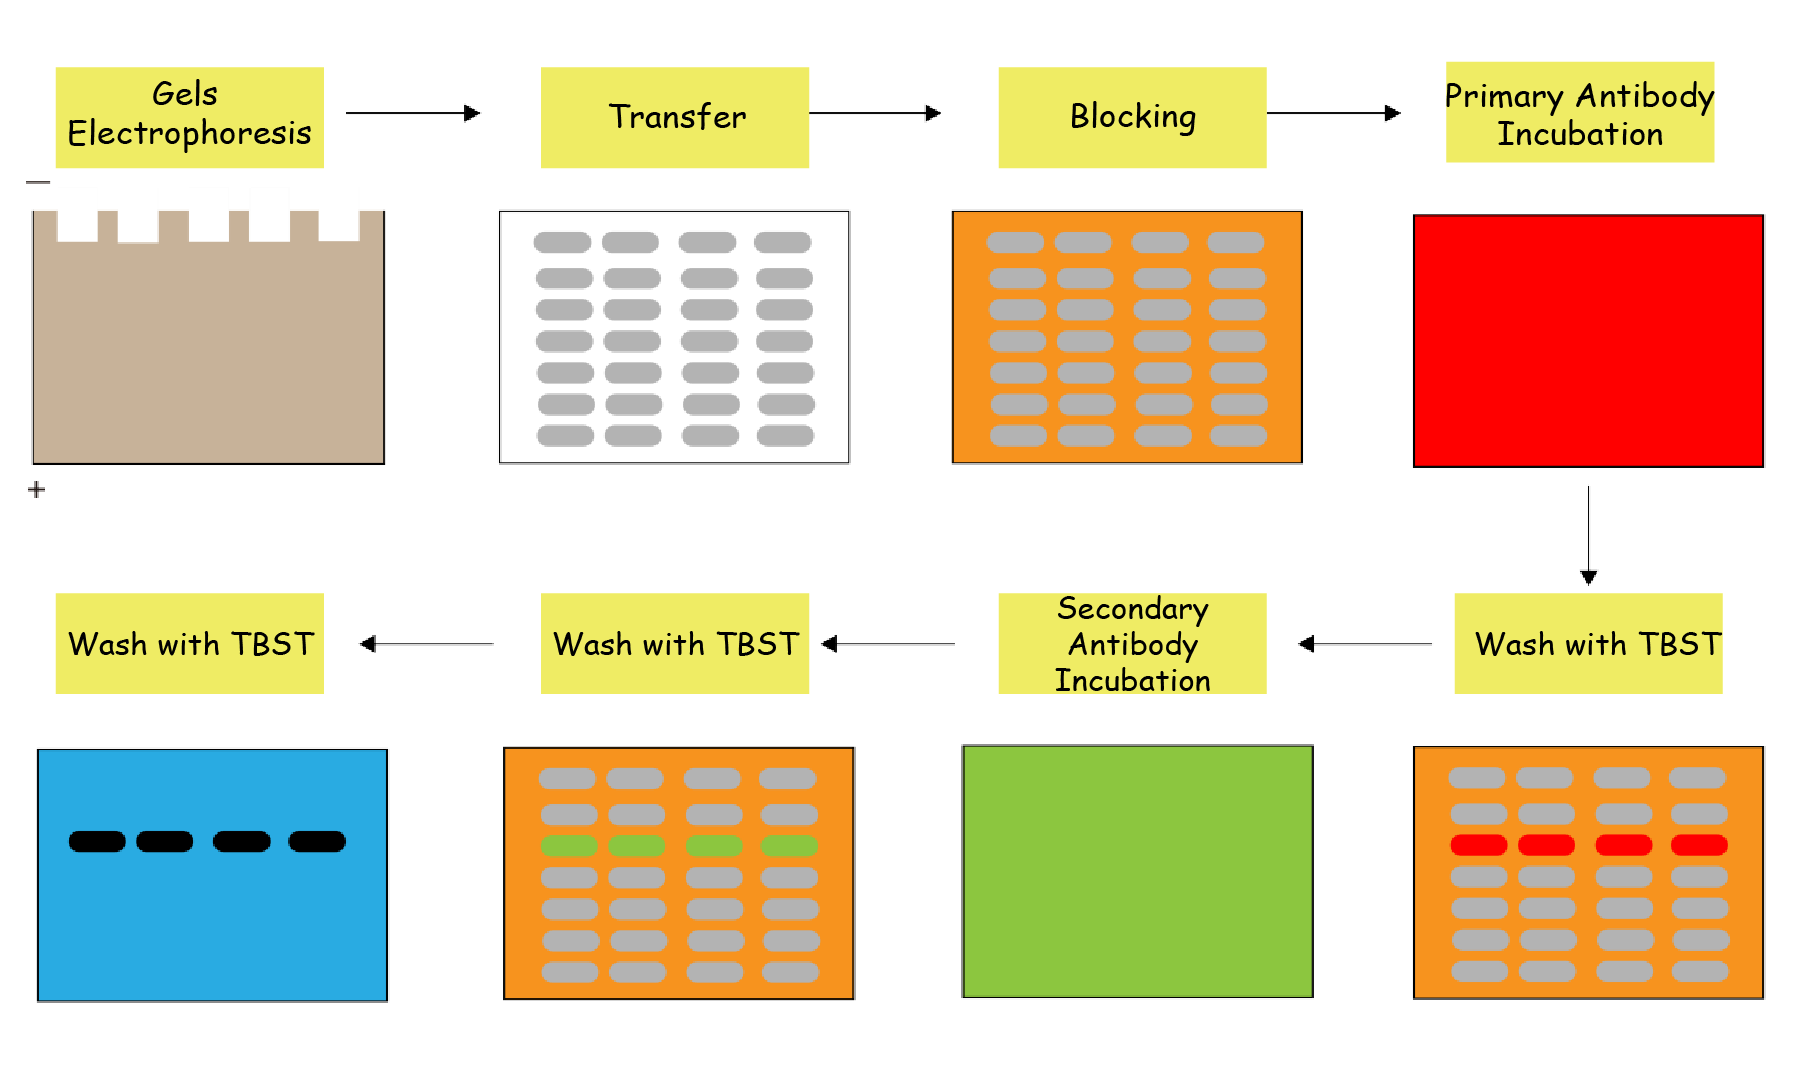
Figure 1. Western blot workflow
Reagents Required
1. Protein loading buffer (commercial buffers are typically 5x or 4x; dilute as per instructions).
2. Rapid protein gel (novices are advised to use pre-stained gels for clear lane visualization; see Figure 4).
3. Protein marker (select based on target protein size).
4. Electrophoresis buffer (self-prepared or commercial powder/solution).
5. Coomassie Brilliant Blue staining solution
6. Transfer buffer (self-prepared or commercial powder/solution; note: some commercial buffers require methanol addition).
7. 5% skim milk (prepared in TBST).
8. ECL chemiluminescent (choose sensitivity based on target protein abundance and sample load).
WB Experimental Protocol
1. Gel Preparation
- Clean glass plates with tap water, rinse with distilled or ultrapure water, and air-dry (or use a hairdryer/oven for rapid drying).
- Select glass plate thickness (0.75mm, 1.0mm, or 1.5mm): thicker gels are preferred for low-abundance proteins or large sample volumes; thinner gels transfer faster but are fragile.
- Align and secure glass plates in the casting stand. Test for leaks by adding ultrapure water before pouring the gel.
- Prepare resolving and stacking gels in 15 mL or 50 mL tubes. Mix resolving gel components (A/B solutions at 1:1 ratio). Repeat for stacking gel.
- Add APS (10 µL zper 1 mL gel; adjust based on room temperature) to resolving gel, mix, and pour.
Add APS to stacking gel, pour over resolving gel, insert comb, and polymerize at room temperature for 30 min.
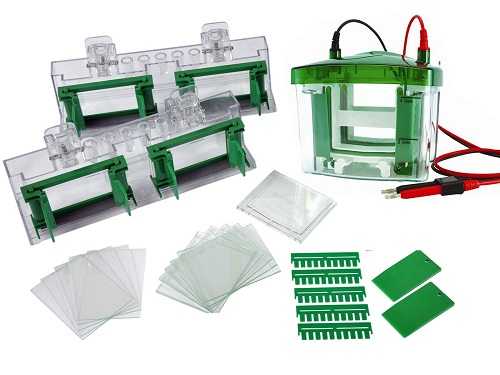
Figure 2. Vertical electrophoresis apparatus for protein gel electrophoresis
2.Electrophoresis
SDS Polyacrylamide gel electrophoresis (SDS-PAGE) separates proteins by molecular weight under an electric field. As shown in Figure 3, proteins migrate rapidly through the low-concentration stacking gel and slow upon entering the high-concentration resolving gel, forming sharp bands.
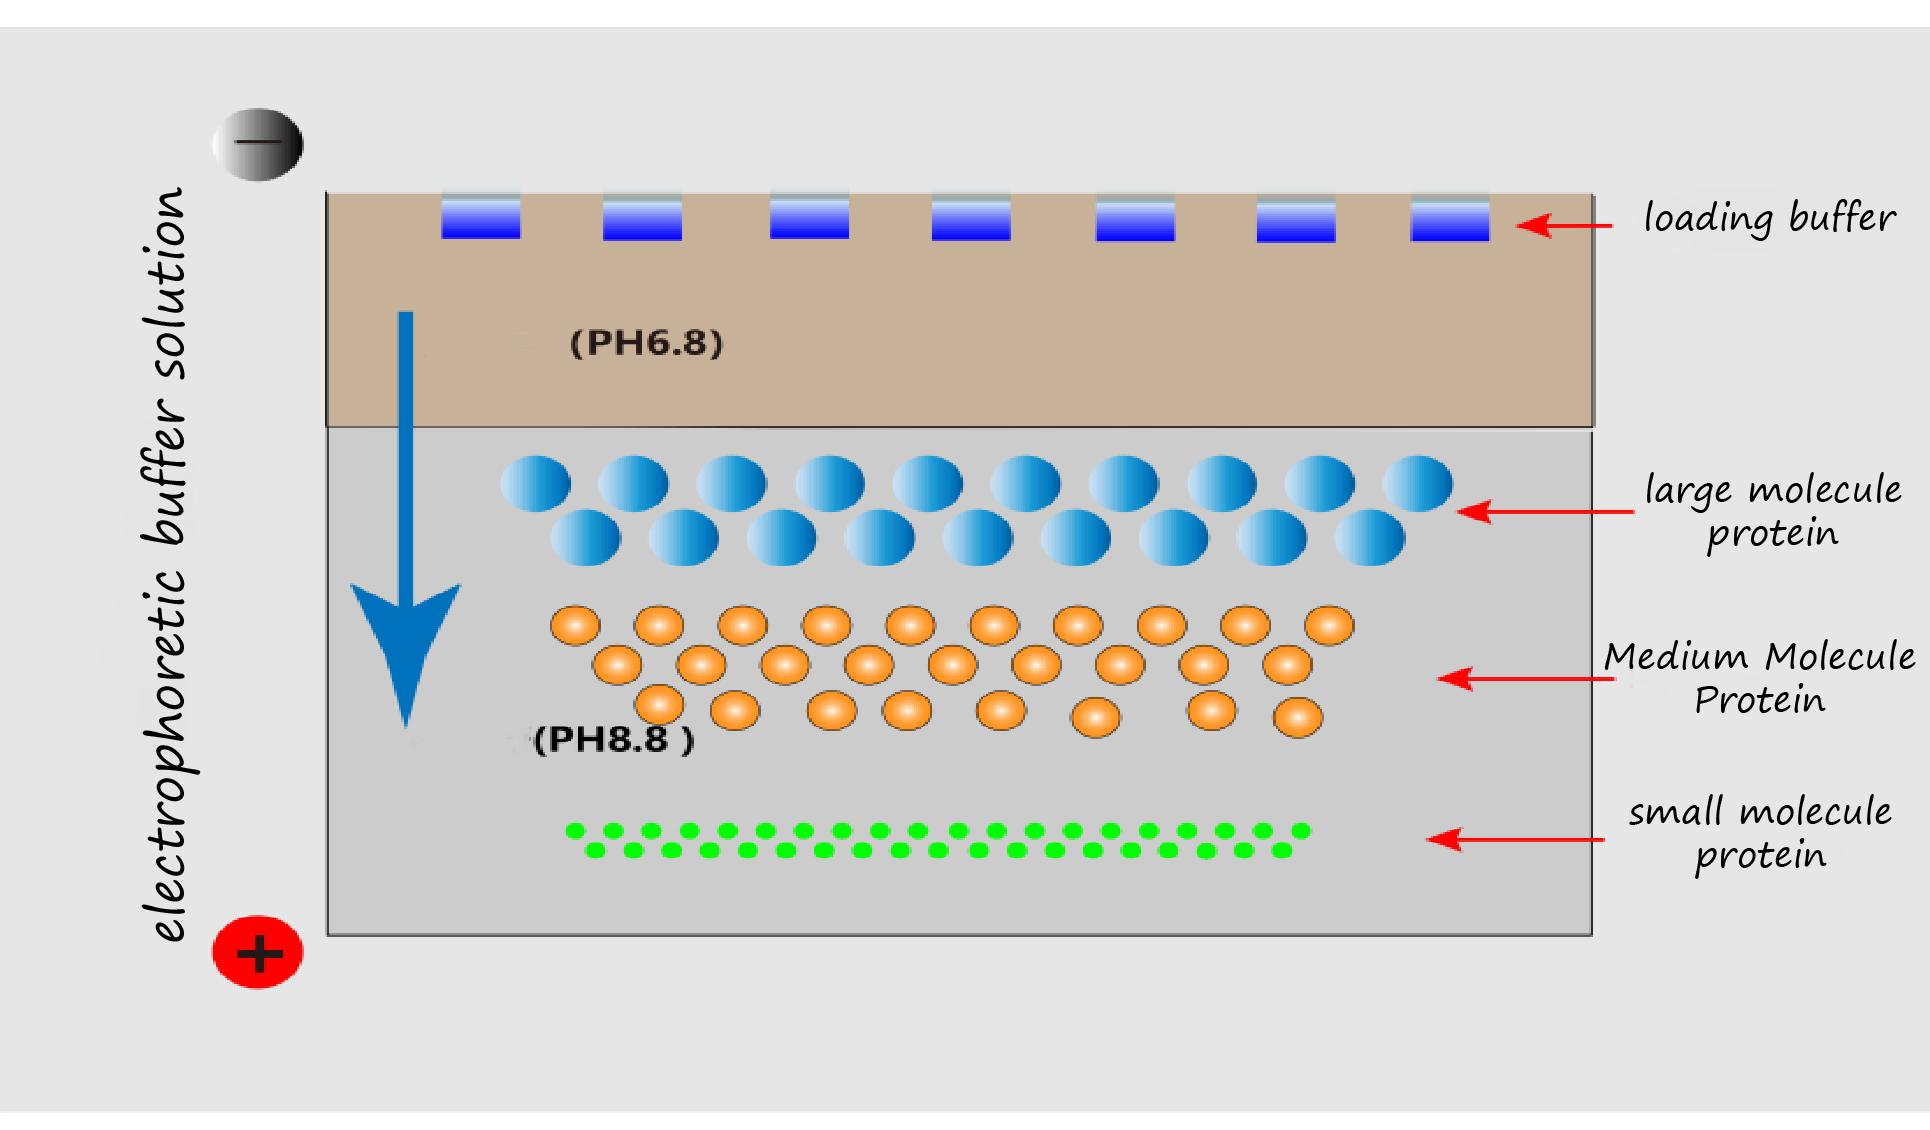
Figure 3. Schematic of gel electrophoresis
1). Assemble Electrophoresis Tank
Place taller glass plate on the outer side and shorter plate on the inner side. Secure tightly to prevent leakage. Fill inner chamber with 1x electrophoresis buffer (e.g., Tris-Glycine). Remove comb gently and rinse wells with buffer. Refill inner chamber to cover the glass plate.
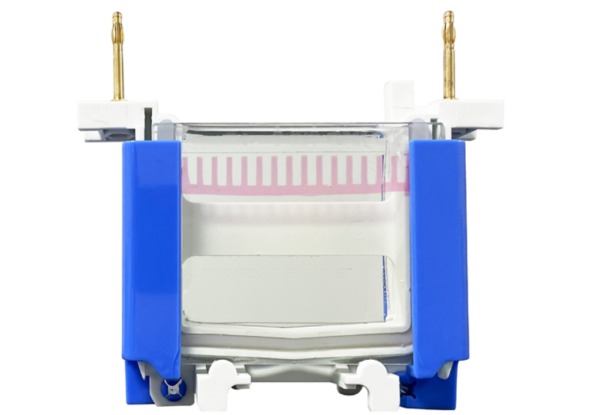
Figure 4. Assembled electrophoresis unit
2). Add Sample
- Thaw protein samples (preferably fresh) and denature at 100°C for 3–5 min. Centrifuge briefly.
- Calculate loading volume based on protein concentration (20–30 µg total protein recommended). Load 3 µL protein marker for reference.
- Load samples quickly to minimize diffusion or cross-contamination. Fill empty lanes with loading buffer.
3). Set Electrophoresis Parameters
- Connect electrodes (red = positive pole, black = negative pole).
- Run at 80 V for 20 min, then 120 V for 90 min (adjust per kit instructions). Perform in an ice bath.
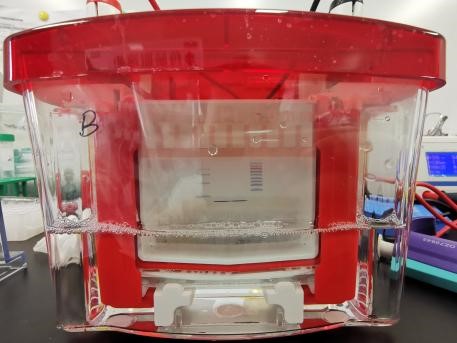
Figure 5. Electrophoresis with pre-stained gel
4). Coomassie Staining (non-essential step)
- Rinse gel with water post-electrophoresis.
- Incubate in staining solution for a period of time until bands appear.
- At the end of the staining, the staining solution is recovered and the gel is placed in water, so that the results can be observed
Transfer (Wet Transfer Method)
1. Transfer proteins from gel to membrane (NC/PVDF) to facilitate antibody binding.
2. Cut filter paper and membrane to gel size. Activate PVDF membrane with 100% methanol (30–60s); equilibrate NC/PVDF membrane and filter paper in transfer buffer.
3. Remove stacking gel and trim excess resolving gel.
4. Assemble transfer "sandwich" in the order: cathode plate → sponge → filter paper → gels → membrane → filter paper → sponge → anode plate (Figure 6). Eliminate bubbles.
5. Transfer at 300 mA, 85 V for 2 h in an ice bath.
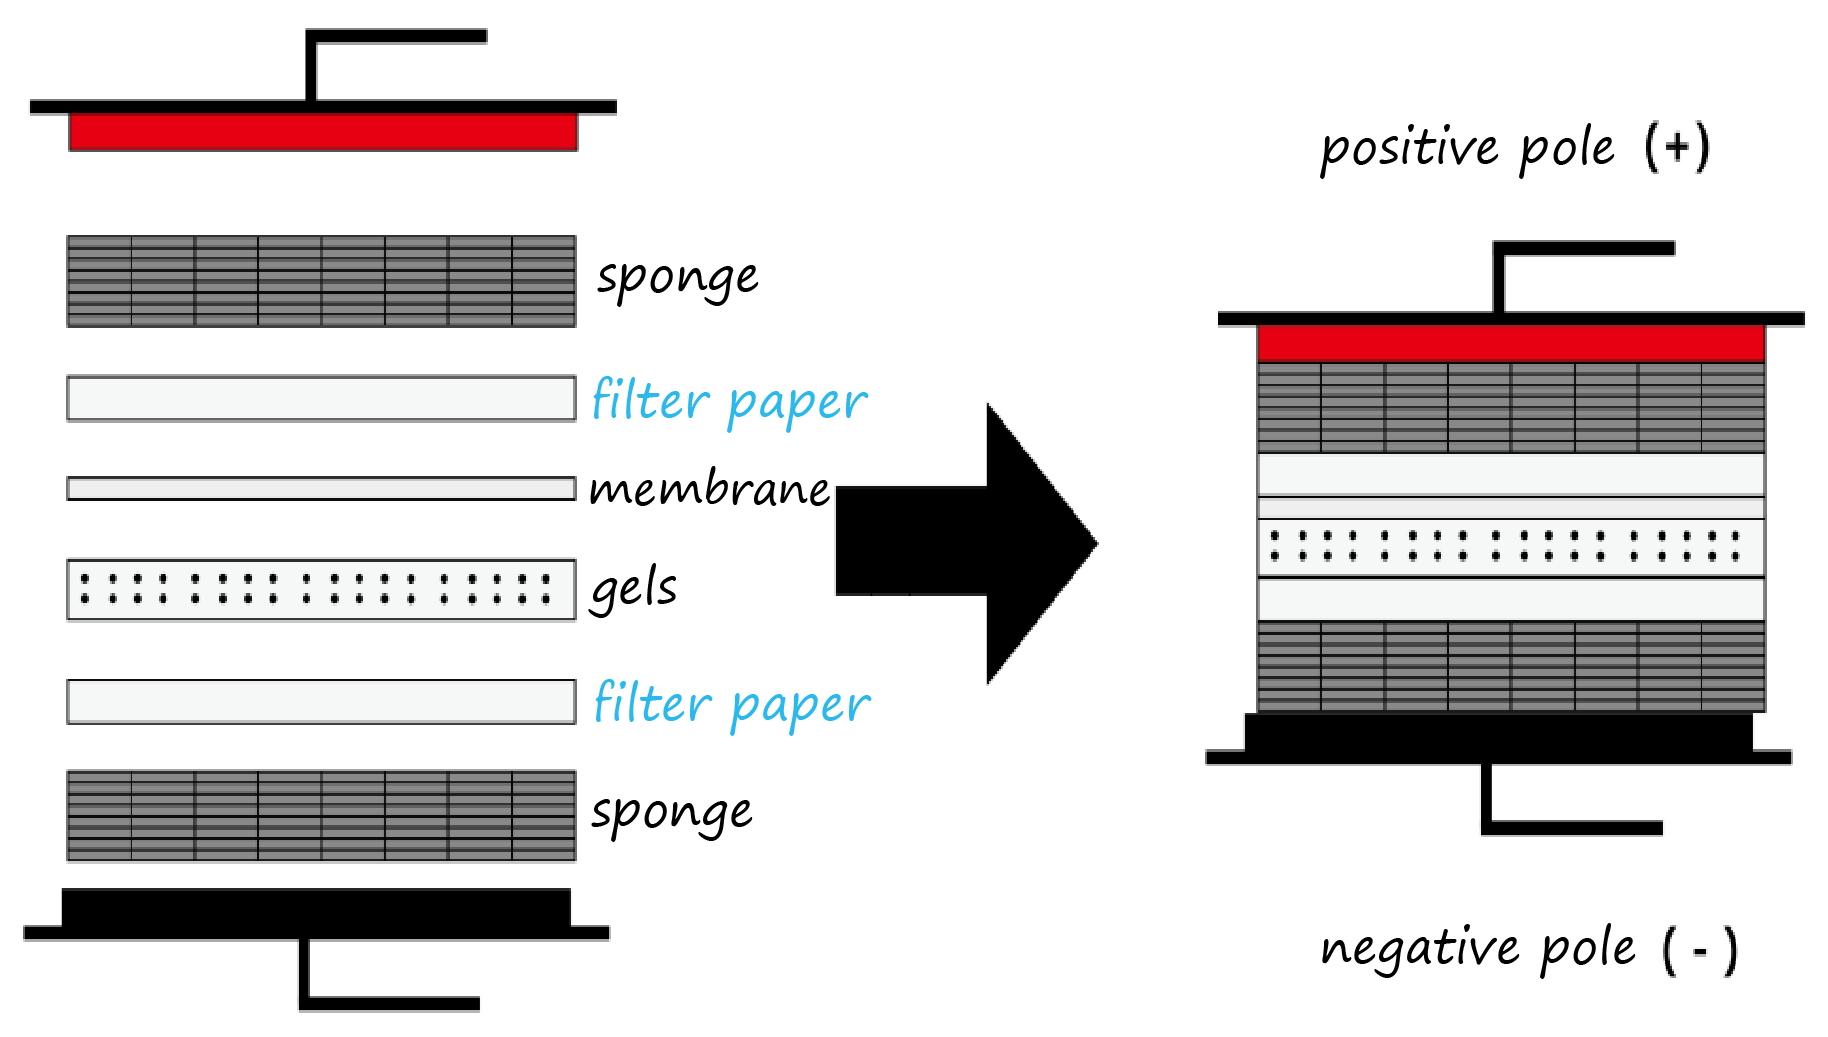
Figure 6. Wet transfer sandwich assembly
Blocking
Block membranes with 5% skim milk in TBST for 1–2 h at room temperature to reduce nonspecific binding.
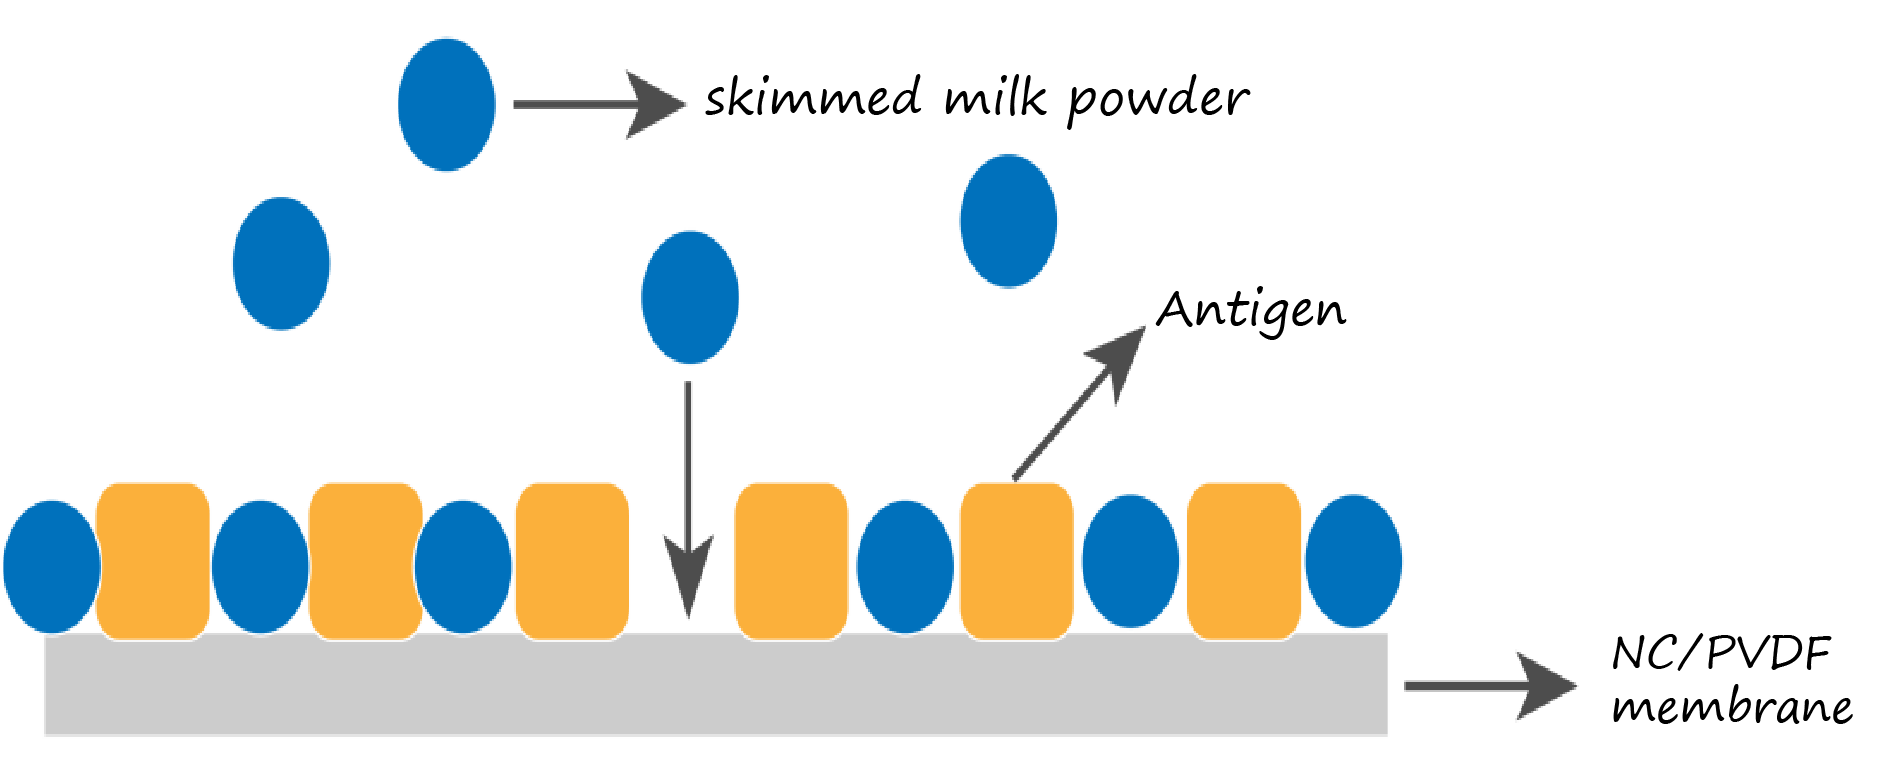
Figure 7. Blocking principle
Antibody Incubation
1. Primary Antibody
- Dilute in antibody Diluent (refer to antibody datasheet for dilution ratio).
- Incubate membrane at room temperature for 1–2 h or overnight at 4°C.
- Wash 3× with TBST (10 min per wash).
2. Secondary Antibody
- Dilute species-matched HRP/AP-conjugated antibody in TBST.
- Incubate at room temperature for 1–2 h.
- Wash 3× with TBST(10 min per wash).
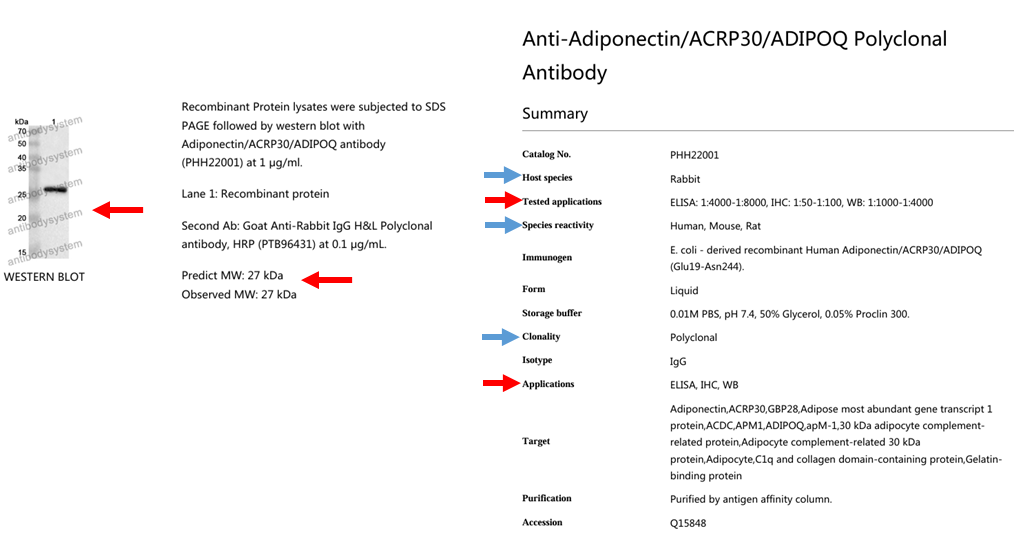
Figure 8. Antibody selection guidelines
Detection (ECL Chemiluminescence)
1. Mix ECL reagents A and B (1:1) immediately before use.
2. Drain excess TBST from membrane (do not dry).
3. Apply ECL substrate for 1–2 min.
4. Move to a darkroom or use an imaging system to expose the signal, the exposure time can be adjusted according to the development effect in order to obtain the best results.
5. After development, if other proteins are to be detected, the antibody on the membrane can be eluted by the membrane regeneration solution, and other antibodies can be re-incubated, following the same procedure as above (you can judge whether the antibody has been completely eluted by developing the membrane again).
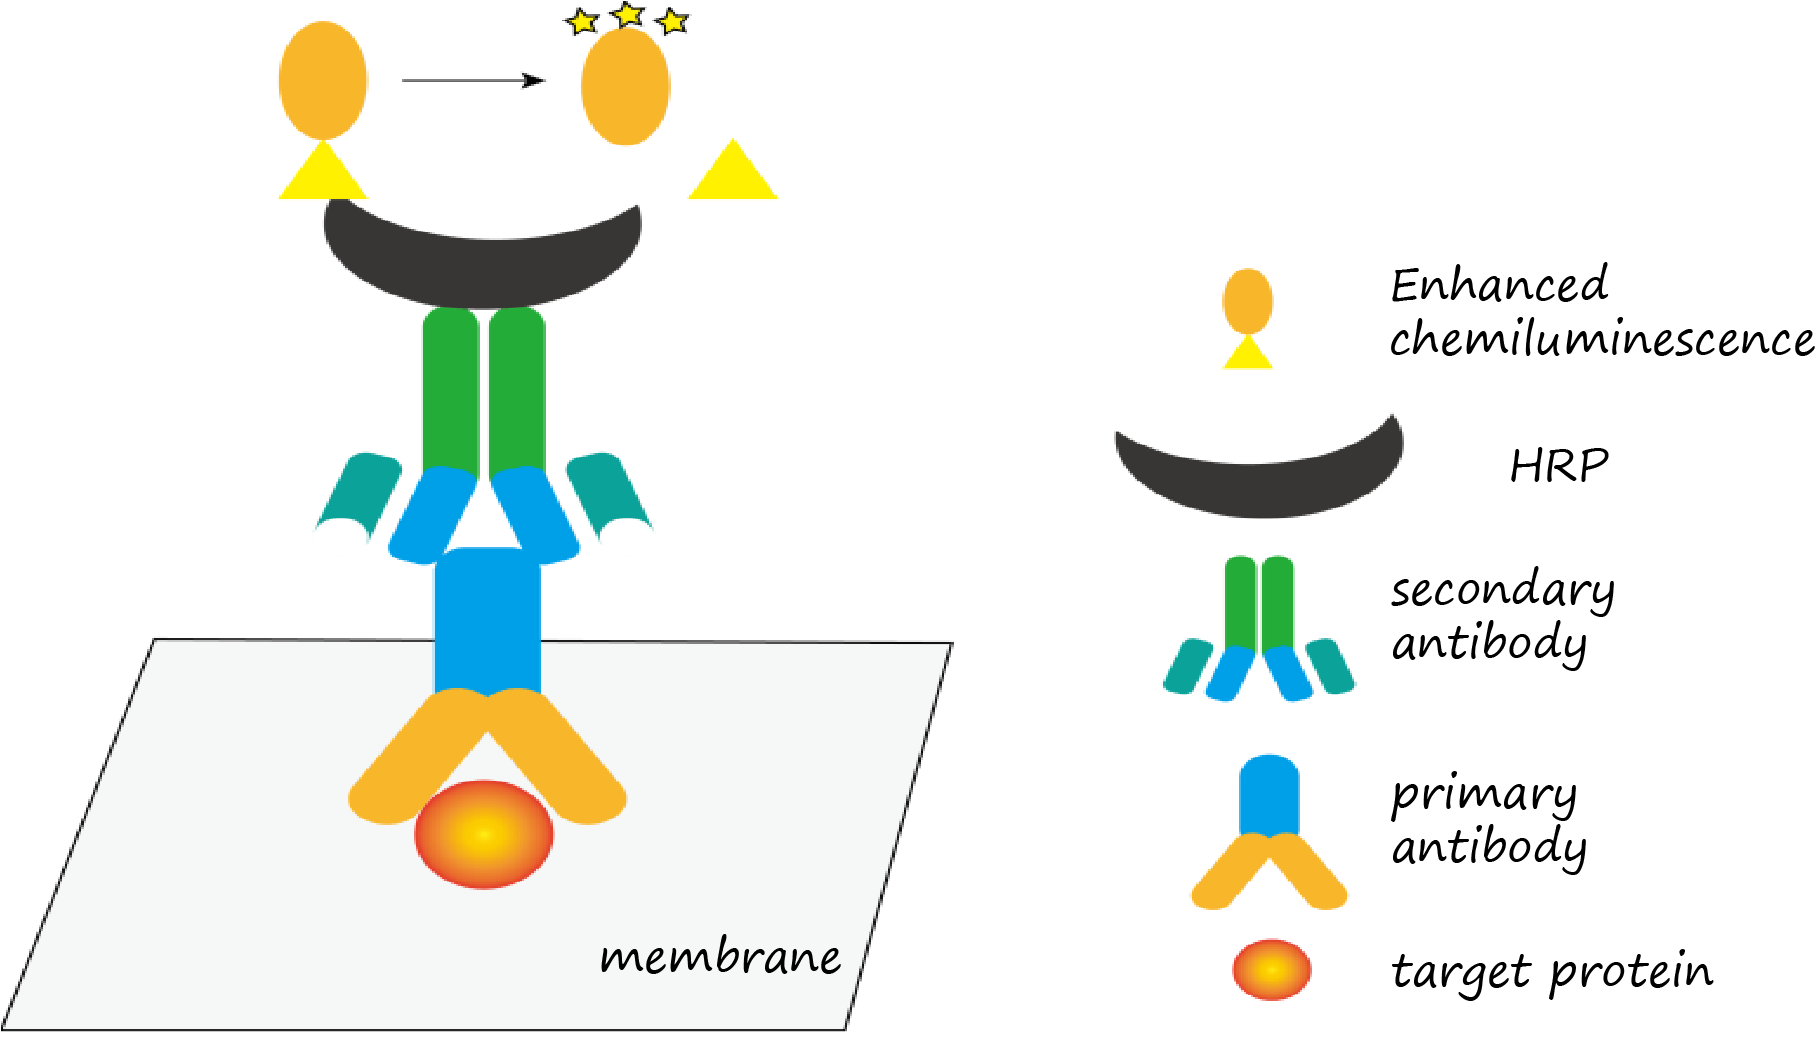
Figure 9. ECL Chemiluminescence detection principle
